I recently stumbled upon the fascinating world of AI-generated avatars, and I couldn’t resist diving in to explore how I could create my own. With models like Stable Diffusion and CyberRealistic, it turns out you can generate lifelike images that truly capture your unique features and style. Whether you're an artist, gamer, content creator, or just someone curious about AI art, I want to share my seven step journey and guide you through the process step by step.
Step 1: Gather and Prepare Your Images
Before you can train Stable Diffusion to recognize your likeness, you need a dataset of images. Here’s what you should consider:
- Quality: Use high-resolution images to capture facial details.
- Variety: Include different angles, expressions, and lighting conditions.
- Consistency: Stick to similar styles and resolutions to avoid distortions.
Aim for at least 10-20 images to get a well-rounded model of your face. To train my embedding I used 39 photos of me.
Step 2: Install Stable Diffusion WebUI
Before processing your images, you need to install Stable Diffusion WebUI from AUTOMATIC1111. This tool provides an easy-to-use interface for running Stable Diffusion on your local machine.
How to Install Stable Diffusion WebUI:
Install Git and Python: Ensure you have Git and Python (version 3.10 recommended) installed on your system.
Clone the Repository:
git clone https://github.com/AUTOMATIC1111/stable-diffusion-webui.git
Navigate to the Directory:
cd stable-diffusion-webui
Run the Setup Script (this will download necessary models and dependencies):
On Windows:
webui-user.bat
On Linux/Mac:
bash webui.sh
Wait for Installation to Complete: The script will automatically install dependencies and set up the environment.
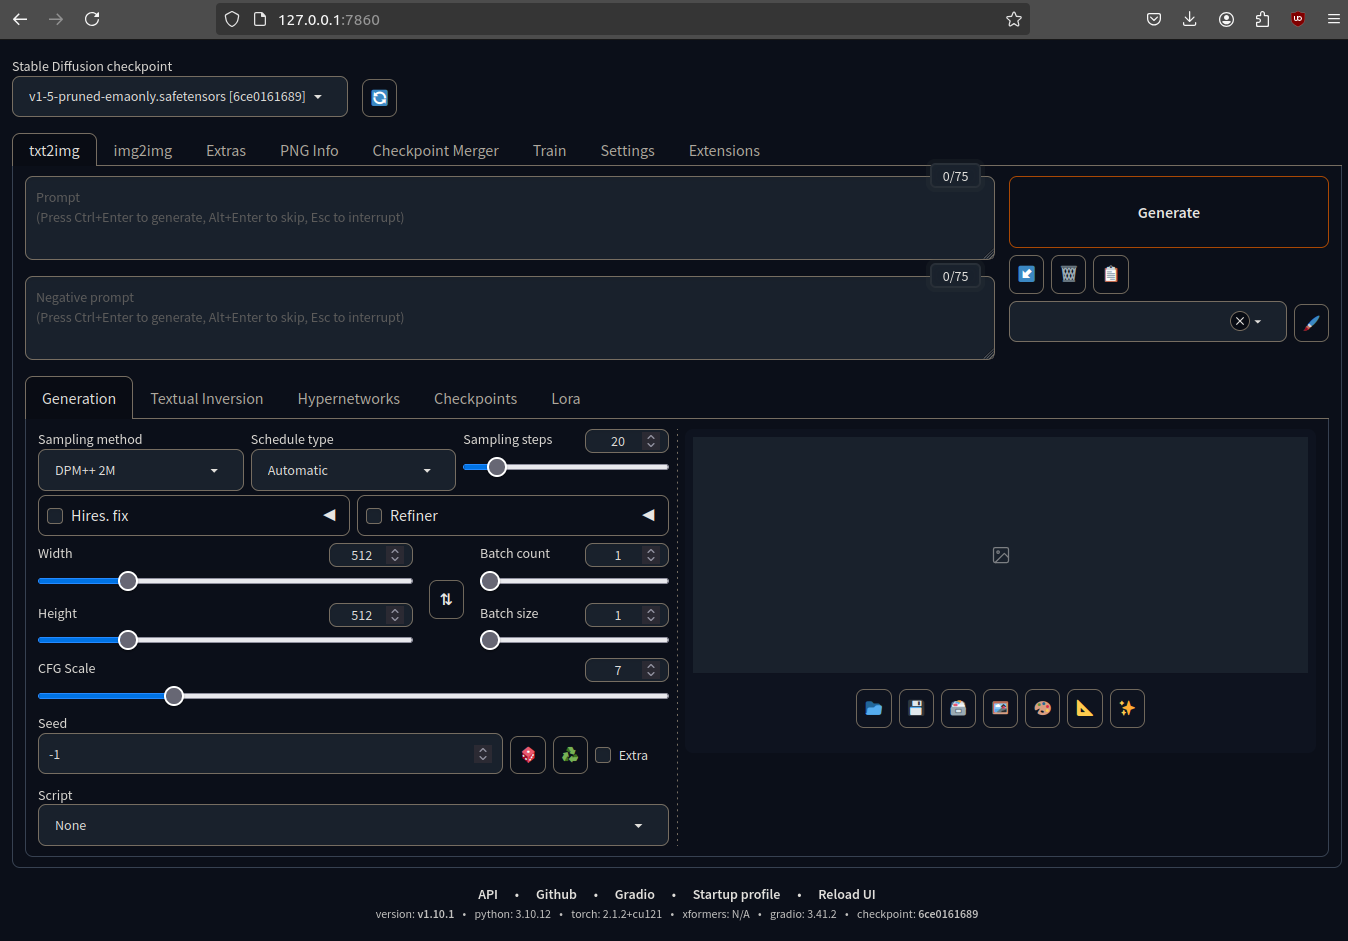
Launch WebUI: After installation, run the script again and open http://127.0.0.1:7860/ in your browser.
Now that Stable Diffusion WebUI is installed, you can proceed to the next step.
Step 3: Resize Your Images to 512 x 512
To ensure consistency in training, all images should be resized to 512x512 pixels. This standardization helps Stable Diffusion process them efficiently and generate better results.
How to Resize Your Images:
- Use Birme for Quick Resizing: The Birme website is a great tool to quickly center and resize your images to 512x512.
- Use an Image Editing Tool: Tools like Photoshop, GIMP, or even online resizers can quickly adjust image dimensions.
- Batch Processing: If you have multiple images, consider using scripts in Python (PIL or OpenCV) or bulk processing tools to automate resizing.
- Maintain Aspect Ratio: If your images are not square, use padding to ensure no distortion occurs.
Step 4: Process Images with Caption BLIP
Before training your model, it's helpful to generate text descriptions for each image using Caption BLIP. These captions assist Stable Diffusion in understanding your images more effectively.
How to Use Caption BLIP:
Access the BLIP Tool: If you're using AUTOMATIC1111’s WebUI, you can enable the BLIP captioning extension:
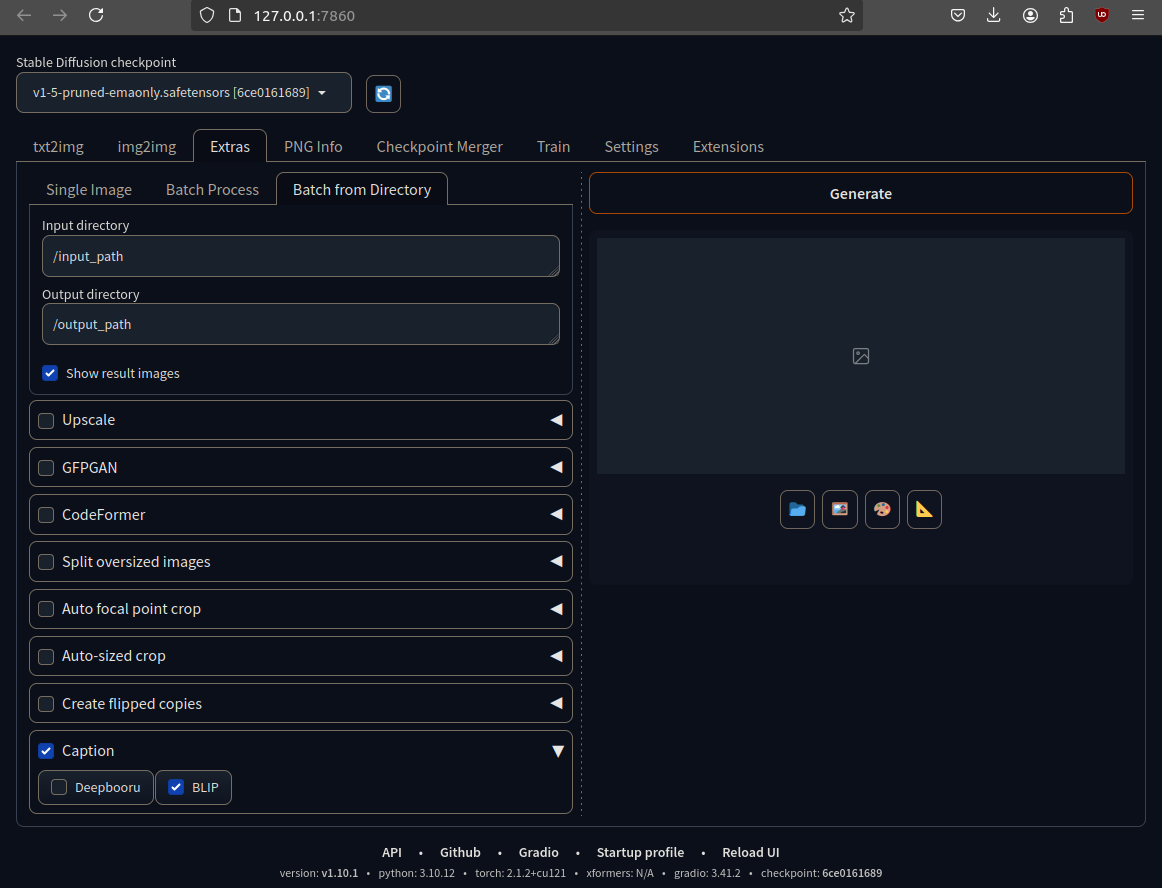
- Process Your Images.
- Upload your dataset.
- Run the BLIP captioning tool to generate automatic descriptions for each image.
- Manually Adjust Captions
- Modify descriptions to improve accuracy and better reflect the image details.
Once your images are properly labeled, you’re ready for the next step.
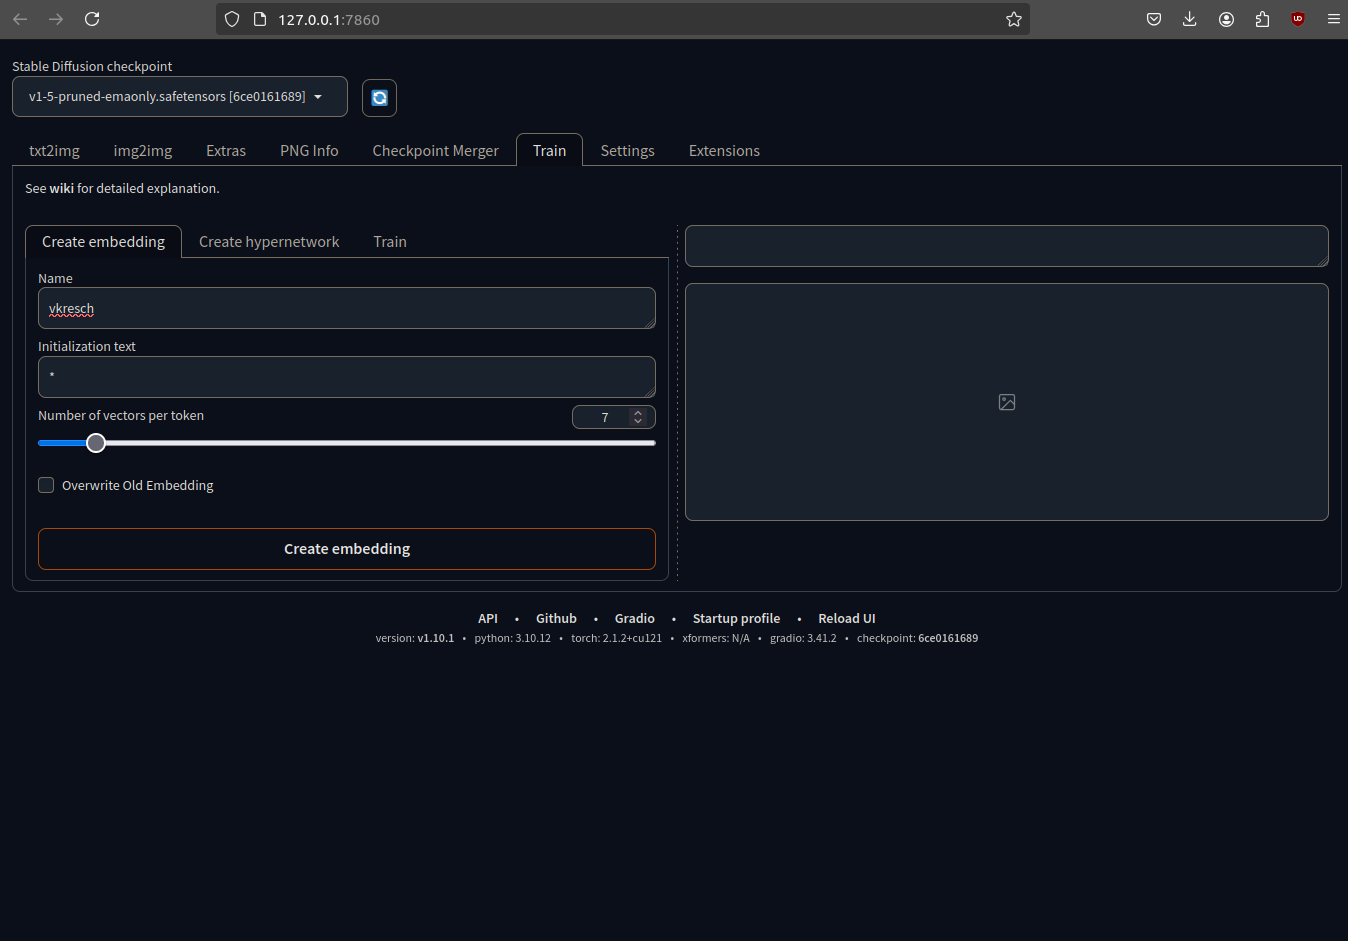
Step 5: Create embedding
Go to the Train tab and give your embedding a unique name so that you can later use it in your prompt. Select also your base model in the top left and chose the number of vectors per token. The number of vectors is correlated to the number of input images. The rule of thumb is:
- less than 10 images, number of vectors = 2-4
- 10-30 images, number of vectors = 5-6
- 30-60 images, number of vectors = 7-10
- 60-100 images, number of vectors = 11-12
- more than 100 images, number of vectors = 12-16
In my case I had 39 images so I chose 7 vectors.
Step 6: Train the embedding
After creating the embedding select the Train tab and the embedding. Chose the configuration I chose and click on Train Embedding:
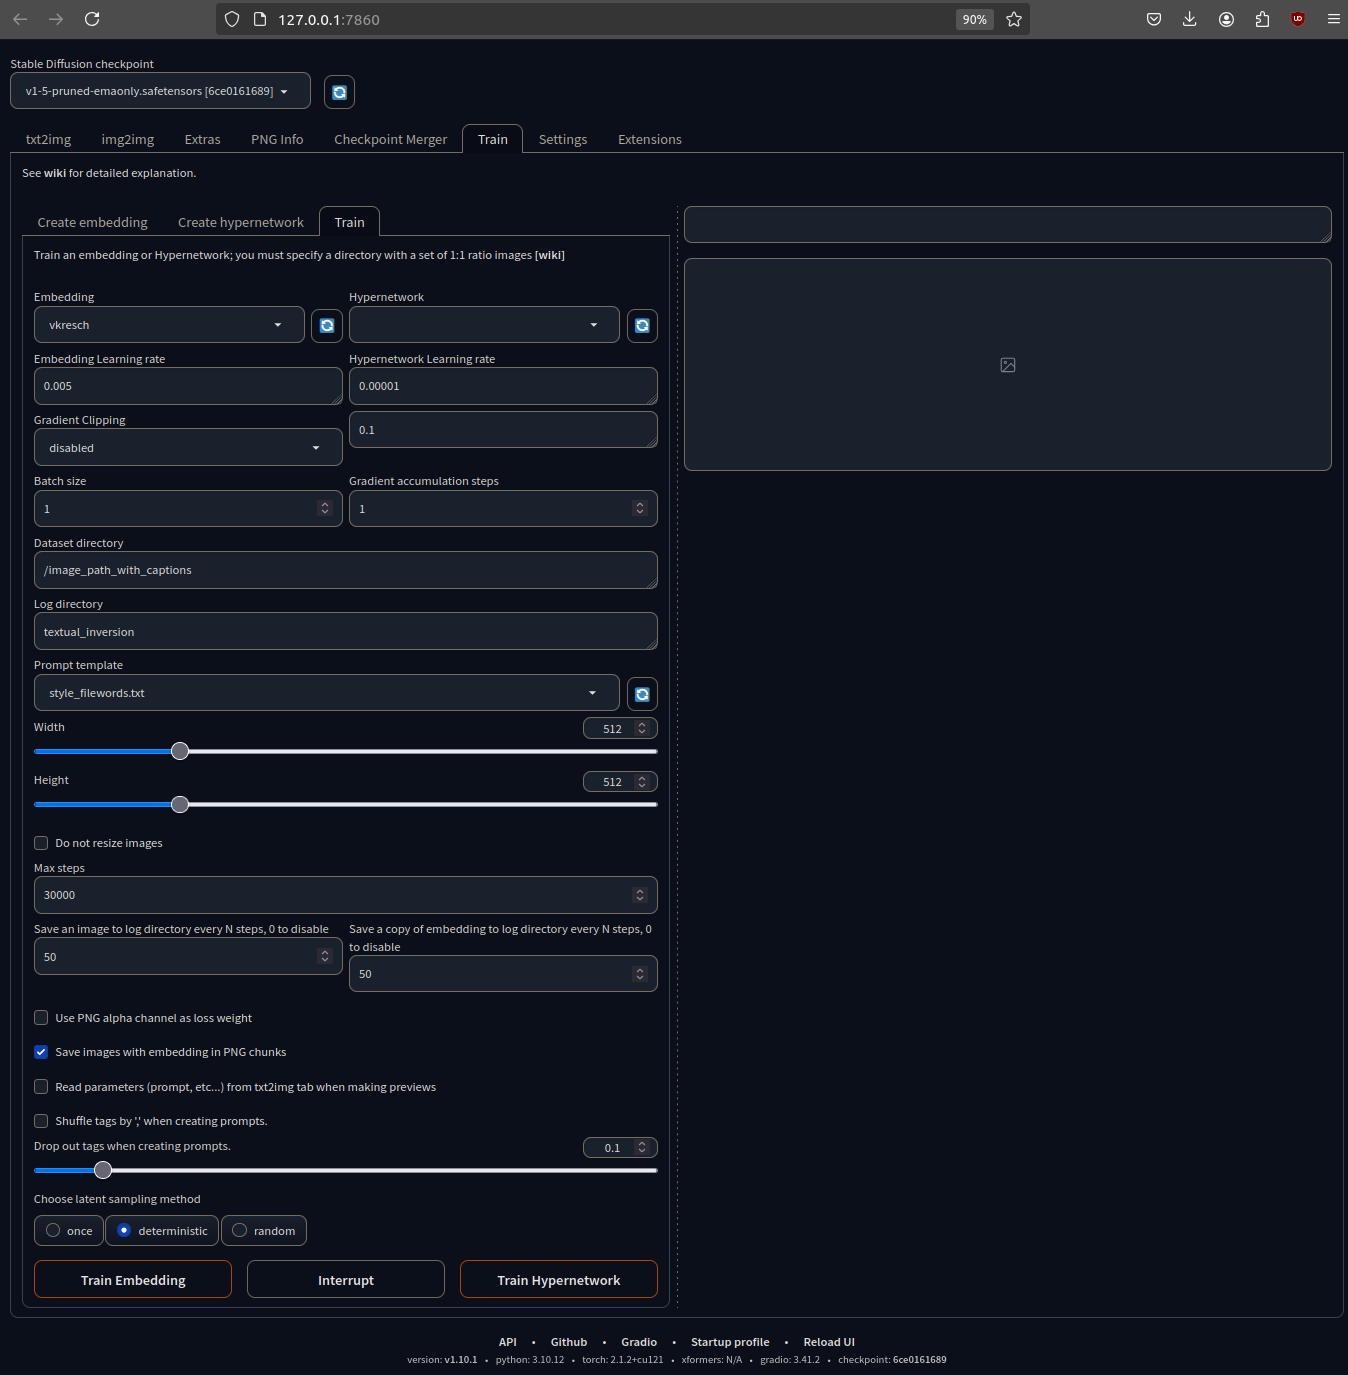
This might take some time depending on your hardware. Once training is complete, you can use prompts with your embedding to generate AI versions of yourself across different models.
Step 7: Using the CyberRealistic Model
Once you have embedded your face into Stable Diffusion, you can enhance the realism of your AI avatar by using the CyberRealistic model. This model specializes in hyper-realistic portraits, making your AI-generated images look as close to real photos as possible.
How to Use CyberRealistic with Your Avatar:
Load Your Trained Embedding: Open Stable Diffusion and select your fine-tuned embedding.
Apply the CyberRealistic Model: Download and integrate the CyberRealistic V7 model.
Craft Your Prompt: Use detailed prompts like:
A highly detailed portrait of [your embedding], ultra-realistic lighting, cinematic depth, sharp focus, 4K resolution, CyberRealistic model
Adjust Sampling & CFG Scale: For best results, use sampling methods like DPM++ or Euler A with a CFG scale around 7-9.
Post-Processing: You can enhance your images using tools like Photoshop or Gigapixel AI for final touches.
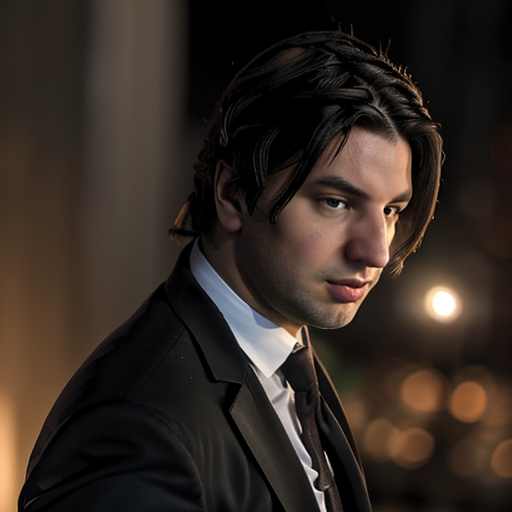
This is the prompt I used for my avatar (vkresch is the name of my embedding):
photo of vkresch, gentleman suit like lupin, gloomy background, horror, brutal, majestic, cinematic, dramatic, digital painting, expressionism, emotionally profound, close up, unforgettable, high quality , dressed in a black suit
Negative prompt
(deformed iris, deformed pupils) , text, worst quality, low quality, jpeg artifacts, ugly, duplicate, morbid, mutilated, (extra fingers) , (mutated hands) , poorly drawn hands, poorly drawn face, mutation, deformed, blurry, dehydrated, bad anatomy, bad proportions, extra limbs, cloned face, disfigured, gross proportions, malformed limbs, missing arms, missing legs, extra arms, extra legs, (fused fingers) , (too many fingers) , long neck, camera, name, signature, watermark, logo, autograph, trademark, cut off, censored, bad anatomy, bad body, bad face, bad teeth, deformities, (boring, uninteresting:1.1)
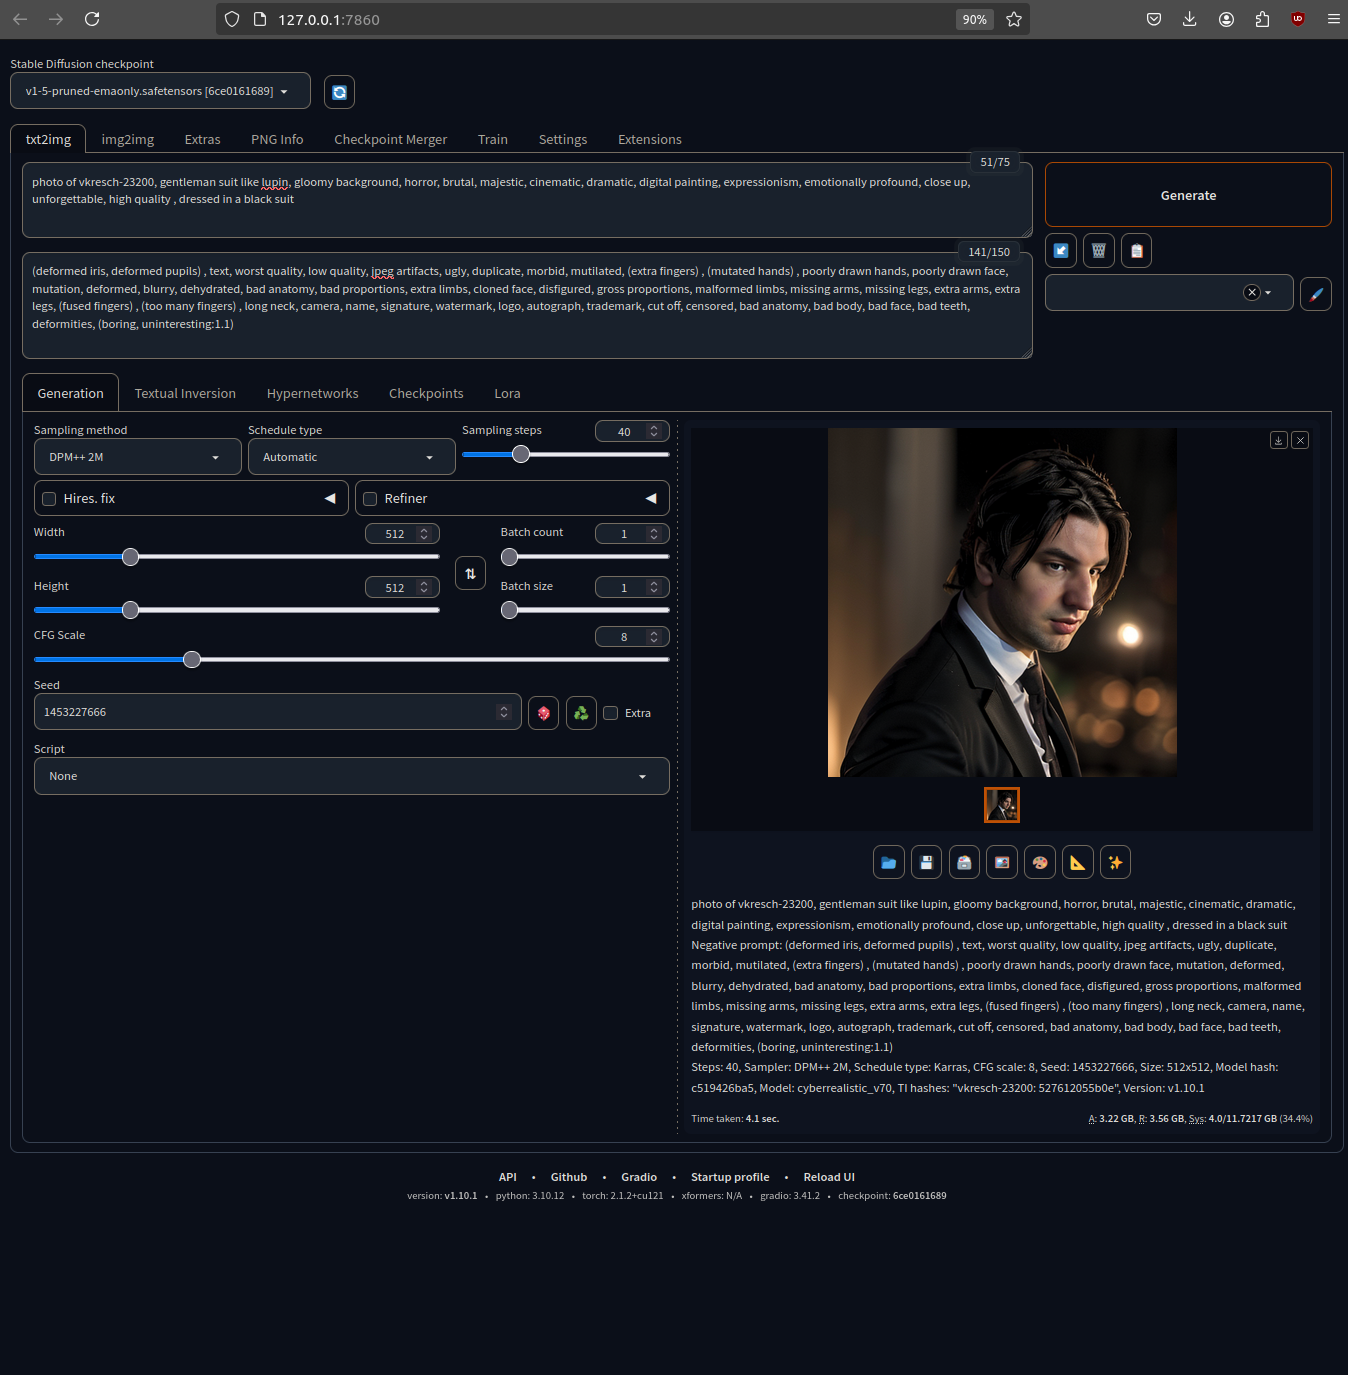
Now that you have a trained model and access to CyberRealistic rendering, you can generate AI avatars in different styles, lighting conditions, and settings. Try combining different prompts, using inpainting for modifications, or experimenting with negative prompts to refine your results.
Final Thoughts
Creating your AI avatar with Stable Diffusion and CyberRealistic is an exciting journey into the world of AI-generated art. With a bit of patience and experimentation, you can craft stunning, lifelike representations of yourself that can be used for social media, gaming, or even creative projects completely for free locally on your computer.